


Roof Vent FAQ
How much air will a Solar Vent extract from the roof space?
The HandiLite Solar Roof Vents are designed as a budget venting solution and as an alternative to the traditional whirly bird product. Their primary function is to create a ventilation process in the roof cavity to prevent the build-up of condensation and moisture which may otherwise damage the roofing structure. This is the identical function to the whirly bird. The primary function of these products is to prevent moisture and heat build-up which may lead to expensive repairs.
When operating under optimal sunlight conditions the 8 watt 200mm Solar vent will extract 11.3 cubic metres of air per minute; while the 5 watt 150mm Solar Vent will extract 5.5 cubic metres of air per minute.
Do I need to install eave vents to work in conjunction with the Solar Vent?
The HandiLite Solar Roof Vents are designed to extract air from you roof cavity. As a result of this function they also pull air into your roof cavity to replace the air being forced out. No roof cavity in Australia is a sealed environment. Air gaps exist between tiles, above the lip of roof gutters and in many other places in all roofs. When operating the HandiLite roof vents will pull air into your roof cavity through any number of these existing openings as a matter of course. While some people would prefer to install eave vents in conjunction with solar vents these fittings are unlikely to greatly increase the amount of air flowing through your roof cavity.
Will pests be able to enter my home through the Solar Vent?
When installing a HandiLite Solar Roof vent it is necessary to create a hole in your roofing material, and because the roof vent contains openings through which warm air may be extracted it is possible that some insects or other pests may enter your roof cavity via this opening. However it is important to remember that no roof cavity in Australia is a sealed environment. Air gaps exist between tiles, above the lip of roof gutters and in many other places in all roofs. It is unlikely that a household pest determined to enter your home would bypass the myriad of other potential ingress points in order to seek out a roof vent positioned at the highest point of the house in order to gain entry.
Where on my roof should I position the Solar Roof Vent to maximise its performance ?
In order to maximize the effectiveness of the Solar Roof Vents it is important that they are positioned on the highest point of the roof. On a corrugated roof this should be with the top edge of the flashing placed beneath the ridge cap. On a tile roof the vents should be located in the second row of tiles from the ridge line. If you are installing more than one Solar Vent try to space them evenly across the roof line.
What is the thermostat setting on the Premium Solar Vent?
The Premium model 200mm Solar Vent is supplied inclusive with a functioning thermostat. This thermostat will switch the fan motor on only when the temperature inside the roof cavity reaches the pre-set temperature level. The default setting for these units is 30 degrees Celsius. The unit is also inclusive of a re-chargeable lithium battery which will continue to operate the fan for up to four hours even when the solar collector is receiving no direct sunlight, provided the temperature in the roof cavity remains above 30 degrees Celsius. This battery will be re-charged by the solar panels when they next receive direct sunlight.
Please be aware that while this unit will not actively vent when the temperature in the roof cavity is below the activation point of the thermostat an element of passive venting will still occur at all times.
How do I install a Solar Roof Vent onto a tile roof ?
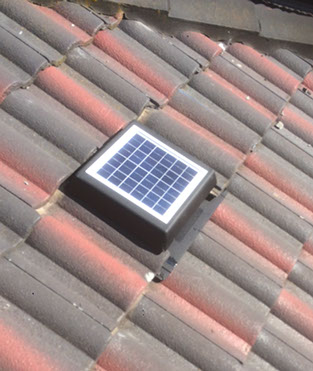
When installing a Solar Roof Vent to a tile roof the tiles should not be pushed under the cowling. The Solar Roof Vent is designed for the tiles to sit up against the top and sides of the upper cowling. Trying to push the tiles beneath the upper cowling will increase the chances of water ingress and potential damage to the vent. Also you must make sure you have knocked of the lugs on the underside of the tile this well help the tile sit back down. We also advise running a bead of silicon down the side of the tile if it happens to sit up fractionally
Here is a picture on a Solar Roof Vent installed to your every day standard tile roof.

Which setting do I use when installing the Premium Roof Vent?

*Sample of label
The HandiLite Premium Solar Roof Vent is supplied with a functioning thermostat. On underside the installer will find a manual operational switch with 3 settings. The 'OFF' setting is designed as a default setting for shipping only . The 'TEST' SETTING allows the installer to confirm that the unit is functioning correctly prior to installation. NOTE it is important that the solar collector is exposed direct sunlight when testing the unit's operation.
The manual switch should be set to the 'ON' position when the unit is installed. NOTE when the switch is in the on position the fan will not spin unless
the thermostat is exposed to temperatures exceeding 30 degrees